Adaptive Layer Height: The Secret to Smoother, Faster 3D Prints
SOFTWARE
4/19/20252 min read

Imagine if your 3D printer could automatically adjust layer height—using thick layers for speed on simple sections and thin layers for detail where it matters.
That’s adaptive layer height, a slicer feature that balances print quality and speed like a pro. No more manually tweaking settings for every curve—just let the software handle it.
But is it worth using? Let’s break it down.
What Is Adaptive Layer Height?
Normally, you pick one layer height (e.g., 0.2mm) for the entire print. But with adaptive layers, your slicer:
✅ Increases layer height on straight, simple areas (faster printing).
✅ Decreases layer height on curves and overhangs (better detail).
It’s like cruise control for 3D printing—optimizing speed vs. resolution on the fly.
5 Reasons to Use Adaptive Layers
1. Faster Prints Without Sacrificing Detail
Flat surfaces? Thicker layers (e.g., 0.28mm) = less print time.
Curved details? Thinner layers (e.g., 0.12mm) = smoother finish.
Best of both worlds. No need to choose between speed and quality.
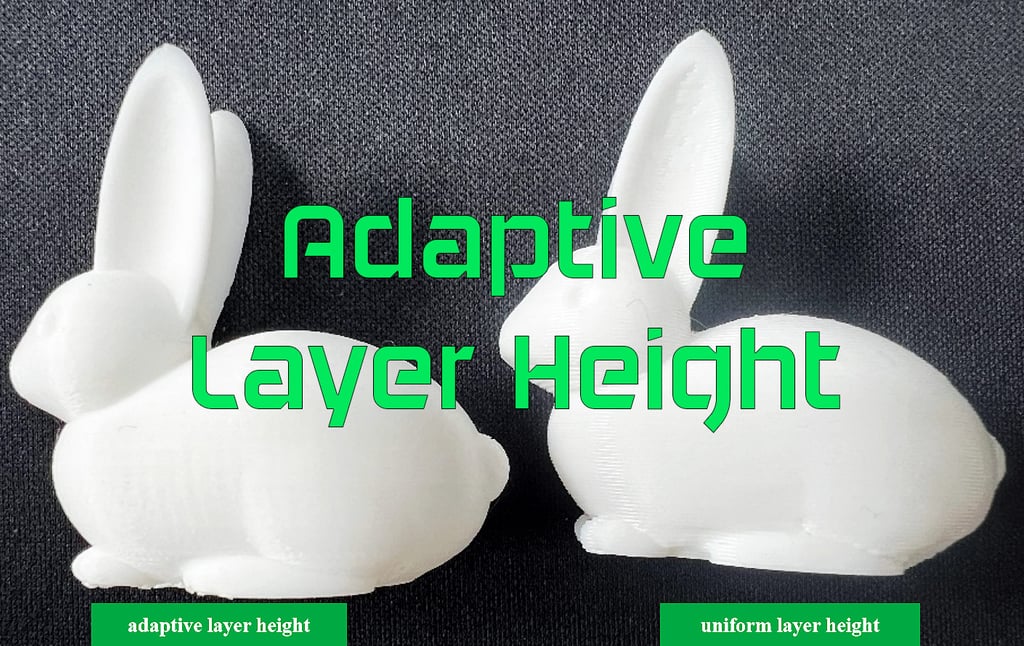
2. Smoother Curves (Bye-Bye Stepping)
Ever seen those ugly "stair-step" lines on rounded prints?
Adaptive layers reduce stepping by using finer layers on slopes.
Works great for organic shapes, figurines, and rounded surfaces.
3. Better Overhangs & Bridges
Thinner layers on overhangs = better adhesion & less sagging.
No more "pillowing" or drooping on unsupported sections.
4. Less Post-Processing
Fewer visible layer lines = less sanding/filling needed.
Great for cosplay props, display models, and functional parts.
5. Saves Filament (Sometimes)
Thicker layers in non-critical areas = less material used overall.
Not always a huge savings, but every bit helps!
When Should You Use It?
✅ Perfect For:
✔ Organic shapes (faces, statues, figurines).
✔ Sloped or curved surfaces (car bodies, helmets).
✔ Functional parts needing strength + detail (gears, hinges).
❌ Skip It For:
✖ Basic geometric shapes (cubes, simple brackets).
✖ Ultra-high-speed prints (if every second counts).
How to Enable It (Cura & PrusaSlicer Guide)
In Cura:
Open Experimental Settings (enable in Preferences).
Check "Adaptive Layers".
Set maximum & minimum layer heights (e.g., 0.1mm to 0.3mm).
In PrusaSlicer:
Go to Print Settings → Layers and perimeters.
Enable "Adaptive layer height".
Adjust detail thresholds (higher = more aggressive changes).
The Catch? It’s Not Always Perfect
Can increase g-code complexity (slightly longer slicing time).
May cause minor inconsistencies if settings are too aggressive.
Not all slicers support it (mostly in Cura, PrusaSlicer, Ideamaker).
Final Verdict: A Game-Changer for Detailed Prints
If you’re printing anything with curves, slopes, or fine details, adaptive layers are a no-brainer. It’s like having a smart assistant tweak your settings mid-print for the best results.
Give it a try on your next miniature, helmet, or sculpted model—you’ll be surprised how much cleaner it looks!