Texture Without the CAD: Mastering "Surface Density" in Orca Slicer
TUTORIALSOFTWARE
2/12/20262 min read
What is Surface Density?
By default, your slicer treats the top and bottom "shells" of your print as solid 100% infill. It’s functional, but let’s be honest—it can look a bit plain.
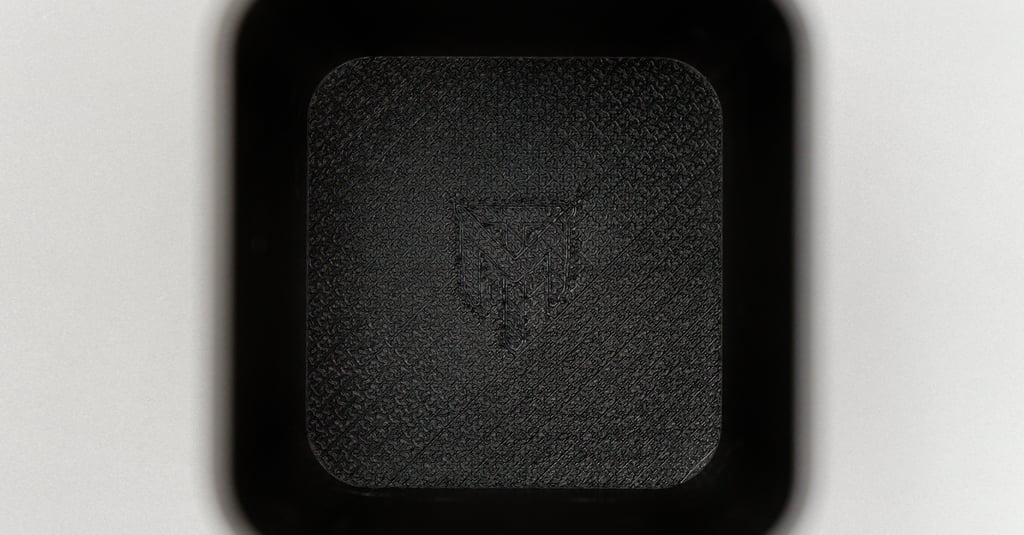
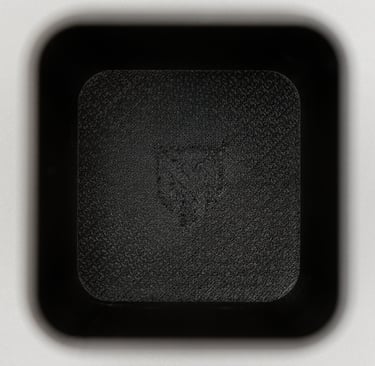
Surface Density allows you to "open up" those top and bottom layers. By reducing the density below 100%, you reveal the underlying pattern of the nozzle path. When you combine a lower density with Orca's unique array of surface patterns, you aren't just printing a part; you're printing a texture.
How to Unlock the Texture in Orca Slicer
Ready to try it? Open up Orca Slicer, drop a simple model (like a coaster or a flat plaque) onto the bed, and follow these steps:
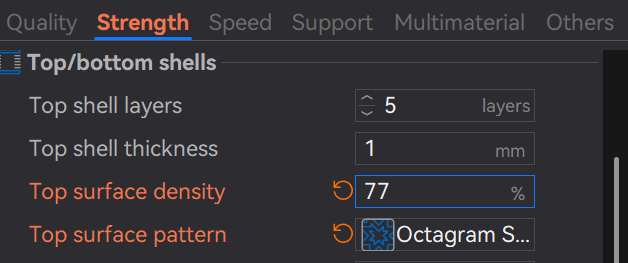
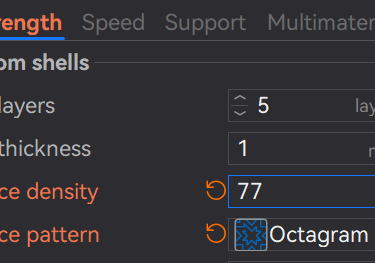
Go to the Strength Tab: In your settings panel, navigate to the Strength category.
Locate Top/Bottom Shells: Look for the section titled "Top/bottom shells."
Adjust Surface Density: * Find the field Top surface density (and Bottom surface density if you want the underside textured too).
Change the value from 100% to something like 50% or 60%. This tells Orca to leave gaps between the lines of the final layer.
Pick Your Pattern: This is where the magic happens. Change the Top surface pattern to one of these for the best effect:
Hilbert Curve: Creates a beautiful, non-directional "frosted" or woven look.
Archimedean Chords: Results in a satisfying spiral effect.
Octagram Spiral: Produces a sharp, star-like geometric pattern.
Why Orca Users Have the Edge
Orca Slicer is a "power-user" fork, and it gives you a few extra knobs to turn that make this feature even better:
Top Surface Flow Ratio: If your pattern looks a bit "messy," you can go to the Quality tab and slightly adjust the Top surface flow ratio. Lowering it slightly (to 0.95, for example) can make the gaps in your 3D texture look much sharper and more intentional.
Precise Wall Control: Orca allows you to set "Only one wall on top surfaces." This ensures your cool new texture goes all the way to the edge without a thick border distracting from the design.
The Results: Functional Art
The best part about this technique is the feel. These prints aren't just visually interesting; they have a physical grip. It’s perfect for:
Coasters: The gaps allow condensation to settle rather than pooling on top.
Mechanical Grips: Adds a "knurled" feel to tool handles.
Art Pieces: Gives 3D-printed "paintings" the texture of a real canvas.
Final Pro-Tip: The "First Layer" Trick
Orca Slicer also has a First Layer Density setting. If you’re printing on a textured PEI plate or a patterned build sheet, you can lower your first-layer density to create a "mesh" bottom that lets the build plate's pattern pop even more!