Tutorial: Embedding Magnets in Your 3D Prints - A Comprehensive Guide
TUTORIAL
4/13/20254 min read
This tutorial will guide you through the process of incorporating magnets directly into your 3D printed objects, adding functionality and a professional touch to your creations.
Phase 1: Design - The Blueprint for Magnetic Integration
This is where the magic begins. Careful planning in your 3D modeling software is paramount for successful magnet embedding.
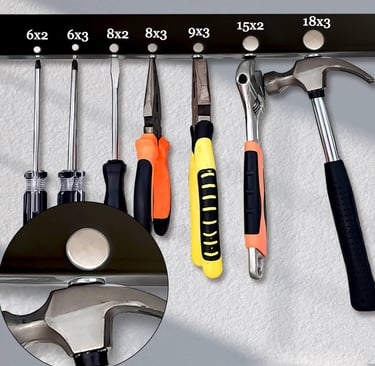
Step 1: Precise Magnet Measurement
Use calipers to accurately measure the diameter and thickness (or length and width) of your magnets. This is non-negotiable! Even slight variations can lead to loose or overly tight fits.
Step 2: Designing the Cavities
Cavity Shape:
Match the cavity shape to your magnet. Cylindrical cavities are common, but rectangular or other shapes may be necessary.
Cavity Dimensions:
Diameter/Width: Make the cavity diameter or width slightly smaller than the magnet. A tolerance of 0.1-0.2mm is often recommended for a snug fit. This "interference fit" helps hold the magnet in place.
Depth: The cavity depth should be equal to or slightly less than the magnet's thickness. You want the magnet to be flush with the surface or slightly recessed.
Wall Thickness:
Ensure sufficient wall thickness around the cavity. Thin walls can crack or break during printing or when inserting the magnet. Aim for a wall thickness at least equal to the magnet's diameter.
Countersinking (Optional):
If you want the magnet to be completely flush or slightly below the surface, design a countersink. This is a small recess at the top of the cavity.
Fillet/Chamfer:
Adding a small fillet (rounded edge) or chamfer (angled edge) to the cavity opening can make magnet insertion easier.
Step 3: Polarity Planning (If Using Multiple Magnets)
If your design involves multiple magnets, it's crucial to plan their polarity (North and South poles).
Attraction: Cavities must be designed so that the appropriate poles attract each other when the parts are assembled.
Repulsion: Conversely, if you want parts to repel each other (e.g., for a spring-loaded effect), design the cavities to align like poles.
Marking: Consider adding subtle markings or indicators to your design to help you remember the polarity of each cavity during magnet insertion.
Step 4: Design Considerations for Printing
Orientation:
Orient your model in the slicer to minimize the need for support structures within the magnet cavities. Supports can be difficult to remove from small, tight spaces.
Bridging:
Cavities that are printed as bridges (spanning a gap) require careful consideration. Ensure your printer can bridge effectively or add support structures if necessary.
Infill:
Adjust the infill density in the area around the magnet cavities to provide adequate support and prevent the walls from collapsing.
Phase 2: Slicer Setup - Orchestrating the Pause
Now, you need to tell your slicer to pause the print at the precise moment to insert the magnets.
Step 5: Identify the Pause Layer
In your slicer's preview mode, carefully examine the layer-by-layer construction of your model.
Determine the exact layer at which the magnet cavities are fully formed and accessible. This is your pause layer.
Step 6: Insert Pause Command
Slicer-Specific Instructions:
The method for inserting a pause command varies slightly between slicers. Consult your slicer's documentation for specific instructions.
Cura: Use the "Pause at height" plugin.
PrusaSlicer: Use the "Add custom G-code" function and insert the appropriate G-code command (e.g., M600 for filament change).
Simplify3D: Use the "Scripting" tab to insert a pause command.
G-Code Knowledge (Optional):
For advanced users, you can directly edit the generated G-code to insert a pause command. However, this requires a good understanding of G-code.
Step 7: Configure Printer Settings (If Needed)
Retraction:
Ensure your retraction settings are optimized to prevent stringing and oozing during the pause.
Z-Hop:
Enabling Z-Hop (lifting the nozzle before travel moves) can help prevent collisions with the magnets after they are inserted.
Cooling:
Adjust cooling settings as needed to maintain print quality during the pause.
Phase 3: Printing and Magnet Insertion - The Moment of Truth
This is where your planning comes to fruition.
Step 8: Prepare Your Magnets
Have your magnets readily available and organized.
If using multiple magnets, clearly mark or identify their polarity.
Step 9: Start the Print
Begin the 3D printing process.
Step 10: The Pause and Insertion
Printer Pause: When the printer reaches the designated pause layer, it will stop.
Quick Action: Work quickly but carefully to insert the magnets.
Orientation: Ensure correct polarity!
Secure Fit: Press the magnets firmly into the cavities.
Glue (Optional): A tiny dab of super glue or epoxy can be used for extra security, especially if the fit is slightly loose. But often, the interference fit is enough.
Resume Printing: Resume the print. The printer will continue printing the remaining layers, encasing the magnets.
Step 11: Finishing Touches
After the print is complete, allow it to cool completely before removing it from the build plate.
Clean up any imperfections or excess material.
Troubleshooting and Refinement
Magnets Don't Fit:
Verify your original CAD dimensions.
Check for over-extrusion, which can make cavities smaller.
Gently ream the cavities with a small drill bit if needed.
Magnets Come Loose:
Increase the interference fit in your CAD design.
Use a small amount of glue.
Print Fails After Pause:
Ensure your printer can reliably resume after a pause.
Optimize retraction and cooling settings.
Minimize any movement of the print bed during the pause.
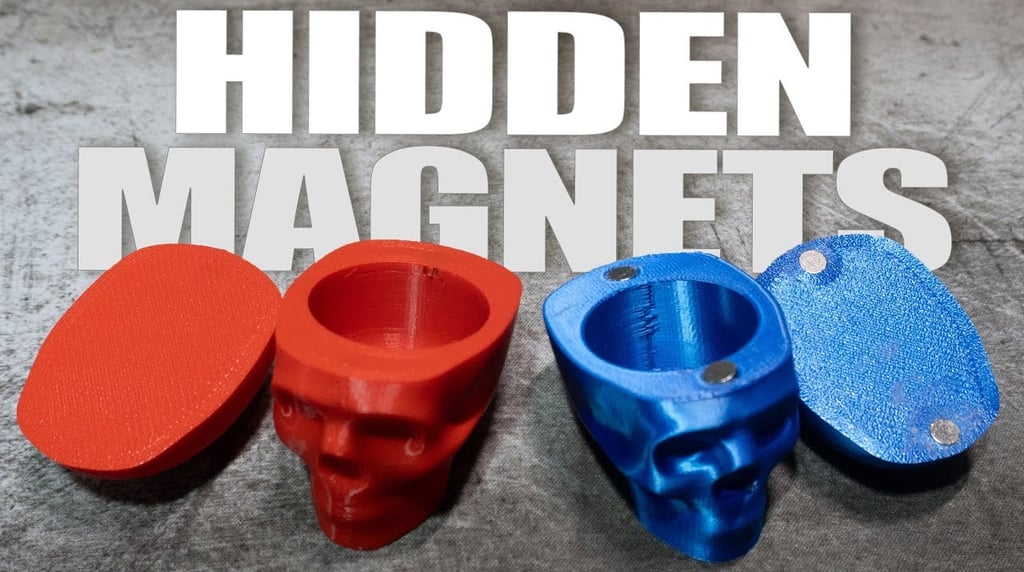
The Power of Magnetic Integration
Embedding magnets in your 3D prints opens up a world of creative and functional possibilities. From simple snap-fit assemblies to complex interactive mechanisms, this technique can add a unique and professional touch to your projects. With careful planning and practice, you can master the art of magnetic integration and unlock a new dimension of 3D printing.
If you want to try it out, I leave you a link for 100 Neodymium Magnets, 8mm x 2mm