Wall Thickness and Orientation: Enhancing Structural Integrity
SOFTWARE
4/1/20254 min read

Alright, let's have a chat about something that can seriously impact the strength and quality of your 3D prints: wall thickness and orientation. It's not just about hitting "print" and hoping for the best; there's a bit of strategy involved.
Building Stronger: The Importance of Walls
Think of the walls of your 3D print as its skeleton. They're the structural foundation that holds everything together. Too thin, and your print might be fragile and prone to breaking. Too thick, and you're wasting material and adding unnecessary weight.
What Exactly is Wall Thickness?
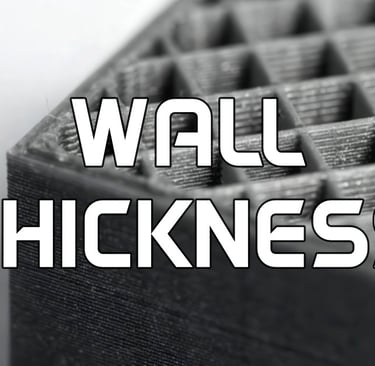
In slicer terms, wall thickness refers to the number of perimeters or outlines that make up the outer shell of your print. The more walls, the thicker and stronger your print will be. It's a simple concept, but it has a significant impact on the final product.
Why Does Wall Thickness Matter?
Strength and Durability: Thicker walls provide greater resistance to impact and stress. If you're printing functional parts or anything that needs to withstand some wear and tear, thicker walls are crucial.
Impact Resistance: Think of it like a reinforced box. A thicker wall will absorb more impact before breaking.
Structural Integrity: For complex designs or parts that need to support weight, thicker walls ensure that the print maintains its shape and doesn't deform under load.
Surface Finish: While it primarily affects strength, wall thickness can also influence the surface finish. Thicker walls can sometimes hide minor imperfections and create a smoother outer layer.
Finding the Sweet Spot: How Thick Should Your Walls Be?
There's no one-size-fits-all answer. The ideal wall thickness depends on several factors:
Material: Some materials, like ABS or Nylon, are inherently stronger than PLA and can get away with thinner walls.
Application: A purely decorative print might only need a couple of walls, while a functional part might require four or more.
Print Size: Larger prints often benefit from thicker walls to prevent warping or sagging.
Nozzle Size: Your nozzle size influences the minimum wall thickness you can achieve. A larger nozzle can print thicker walls more efficiently.
Design Complexity: Models with complex geometries or thin features may require thicker walls for structural stability.
The Power of Orientation: How You Place Your Print
Now, let's talk about orientation. It's not just about fitting your print on the build plate; it's about strategically positioning it to maximize strength.
Why Does Orientation Matter?
Layer Adhesion: 3D prints are inherently weaker along the layer lines. When stress is applied perpendicular to the layers, the print is more likely to break.
Stress Distribution: Orienting your print to distribute stress evenly can significantly improve its strength.
Support Structures: Orientation affects the amount of support material needed, which can impact print time and material usage.
Surface Finish: The orientation can influence the surface finish, especially on curved or complex surfaces.
Strategic Orientation: Tips and Tricks
Minimize Stress Along Layers: Orient your print so that the forces it will experience are applied parallel to the layers, not perpendicular.
Consider the Load: If your print will be subjected to a specific load, orient it to distribute that load evenly.
Maximize Contact Area: If possible, orient the print to maximize the contact area between layers, improving layer adhesion.
Minimize Support Structures: Strategically orient your print to minimize the need for support structures, saving time and material.
Test and Experiment: The best way to find the optimal orientation is to experiment with different positions and analyze the results.
Visualize the Stress: Some slicers allow you to visualize the stress on your models. Use these tools to understand how orientation affects stress distribution.
Understand the part usage: a part that will be used for vertical traction, should be printed in a vertical position. A part that will be used for horizontal impact, should be printed in a horizontal position.
The Synergy: Wall Thickness and Orientation Working Together
The real magic happens when you combine strategic wall thickness with optimal orientation. By carefully considering both factors, you can create prints that are not only strong and durable but also visually appealing.
Practical Examples:
A Phone Case: If you're printing a phone case, you might want to use thicker walls for impact resistance. Orient the case so that the layers run along the length of the phone, minimizing stress on the layer lines.
A Tool Handle: For a tool handle, thicker walls provide a comfortable and sturdy grip. Orient the handle so that the layers run along the length of the grip, maximizing strength.
A Decorative Vase: A decorative vase might not need thick walls, but orienting it to minimize support structures can improve the surface finish and reduce print time.
A Gear: Gears that will be used in a high stress environment, should be printed with the teeth oriented in the Z axis, instead of the X or Y axis. This maximizes the strength of the teeth. Also, a high wall count, and a high infill percentage, are recommended.
The Art of Optimization
Ultimately, wall thickness and orientation are about optimization. It's about finding the perfect balance between strength, weight, print time, and material usage. It's a skill that develops with experience, so don't be afraid to experiment and learn from your mistakes.
By understanding the principles behind wall thickness and orientation, you can take your 3D printing to the next level. You'll be able to create prints that are not only functional and durable but also visually stunning. So, go ahead, experiment, and unleash the full potential of your 3D printer.